remain alive and well
Yep, remain alive and well.
Too busy trying to convert ancient (?) VHS videos to digital.
And 'tis a long and steep learning curve ... electronics change quickly.
![]()

Yep, remain alive and well.
Too busy trying to convert ancient (?) VHS videos to digital.
And 'tis a long and steep learning curve ... electronics change quickly.
![]()
This post is a sort of adjunct to the previous one.
The "screenshot" in the previous post belongs to this clip ..
Which have only just had the facilities to upload .. but was created and rendered into .WMV in Magix P12, not P14.
Clip is of an air display by a P40 Kittyhawk and P51D Mustang (CA-18) at the Jamestown (South Australia) Airshow in October 2006. Includes a "mock" attack on a General Grant tank.
Pyrotechnics arranged by Mark Hollowell.
Have just downloaded Magix Movie edit Pro14 e-version and - apart from some hassles with the WiFi link which kept dropping out (not guaranteed to reduce frustration levels nor increase a cheerful attitude about a file size of 436.5 Megabyte) - have to say that initial impressions are a smidge less than neutral.
For a start, it costs twice as much ($US84.99) as Movie edit Pro12 e-version - Looks very similar, and so far haven't seen any particular additions or improvements apart from "support for Blu-ray Discs™ and AVCHD camcorders". In fact, there are more fades and special FX in the folders in MME P12.
So, for those with MME P12 considering an "upgrade", would suggest holding off for the time being.
On the other hand, do go to the website and check it out. There is also a "new" offering - iClone 2 SE which looks to be some sort of "animation" program, but might not be found unless one actually purchases, or downloads the "trial" version of MME P14e.
Further update(24 Jun): Am not all that "cluey" with this sort of thing, and have trouble understanding what i think of as "logical inconsistencies".
Magix P14 is an "updated" version of MME p12, not an "update" to it. For some reason can find .MVD projects created in MME P12, edit them in P14, but have yet to figure out a way to "save" them into the "Projects" section of P14.
Also, after rendering, they seem to disappear. Can find projects and rendered files in the "My audio/video" section of MME p12 - but for some reason can't find files in MME P14 "My Projects" folder. There doesn't seem to be the matching "My Projects" folder .. but that may be due to the fact that have yet to 'capture', and 'edit' anything INTO MME P14.
 (click to enlarge)
Labels:
digital video,
editing
![]()
Yer, I know, long gap.
Much has happened; exited lawn-mowing, bought caravan, am "on the road" again. Internet connection will be sporadic and unpredictable. For the past 8 weeks, have been working on a farm out in the countryside of South Australia, so video and edit time has been sparse. The job was "casual" and have recently become "surplus to requirements" so have more time to spend on video.
More updates as time permits.
Labels:
Personal
![]()
Another reason that have been very quiet on this blog is that have been messing around trying to come to grips with a rather amazing 3D Animation program.
Was initially poking around looking for a free (or cheapish) 3D Animation program to create a simple effect to use in one of my short films (been in production for 6 months or so .. mostly shot, sort of waiting for the animation bit - and NOW, of course, will have to "re-shoot" it HDV .. heh ).
Found a whole heap of "free" ones on the net .. but one of the things that stumped me was that I had not the slightest idea of how they worked. Even the "help" files were sadly lacking in detail, or used words that had never heard of.
Then, stumbled across DAZ 3D. OK, the "starter" program is free .. and I presume it gives some idea of how the program works, but I also decided to "purchase" the Starter Pack which was actually quite cheap. Have, at the moment, spent roughly $AU100.00 just to get something decent to "play" with, but is not really necessary when starting out. They've organised it into a "modular" system - can spend as much as you like, from zero upwards.
HOOO BOY! Welllll. It really is a beautiful system. Took me a while to figure out how it all worked, as there are hundreds of menus for tweaks, twitches and morphs BUT, it seems to have been very thoughtfully put together, and is full of what I would call UNDERSTANDABLE detail, even for a dill-brain like me - and one of the things that I love about it is that the "puppeteer" makes things just so easy. (Well, it's not all that easy, but a bloody sight easier than anything else that have found - AND, it does come with a 300 page, easy to read and understand PDF manual, as well as understandable tutorials on the site.).
Won't put much detail here, just go to the site (click the logo at the top - click "3D Software" at the top then, from the Left-hand list- "DAZ Studio", then "Downloads") - OR "take the tour" and see for yourself.
At some point will write up what have been up to and perhaps a pic and video, but my efforts so far aren't really suitable as a "demo". Not to worry, will keep beavering away at it .. heh.
There is, perhaps – due to the cheap price and strange name – MAGIX – a temptation to assume that it is a sort of “Mickey Mouse” outfit (shades of Walt Disney, Sorcerer's Apprentices and men if funny hats?).
In my opinion – far from it.
This is not intended to be a detailed expert “Review”, “Tutorial” nor “Recommendation”; written more as "information" for the "interested newcomer" and/or "enthusiastic amateur" contempating the move to High Def Video, rather than the "committed professional", as I have yet to see the result of taking it up to its full capability.
There are many Non Linear Editing (NLE) systems and programs available in the marketplace and this - apparently originating in Germany - is but an example of one of them.
Emphasis is, or has been, mostly placed on the American dominated and marketed “mainstream” programs, and there has been very little mention of this product in Australia so have taken it upon myself to give a limited - introductory - overview of its capabilities and functions. Limited - as while have been using the MME P10 version (off and on) for more than 12 months, and know quite a lot about that one - have only had this version for a few weeks. They are basically similar, and will look at the differences later on.
Have, several times, seen - from those just starting out on the adventure of Digital Video - the question “What NLE should I use?” “All I want to do is ... ”.
There is no definitive answer to that one, and the answers generally revolve around “Depends on what you want to achieve” or "How much spare money or time do you have".
Am also assuming that most newcomers have, in the back of their mind somewhere – images planted by “Broadcast Quality” TV visuals and effects (I know I do), but unless we are a Packer, Stokes or Murdoch, the price and upkeep of “Broadcast Quality” Editing hardware and software is slightly beyond the reach of most average pockets.
So, what to do? Where to start?
We all start with a camera. These days, more than likely, a digital Video camera. Then, at some point, comes the thought – the desire to .. well, “tissy things up a bit”. Some simple and easy to learn system to take out all the really crummy shots, join the good ones together, add a title or two. Perhaps add a background music soundtrack, easily burn the result to DVD .. nothing fancy .. really.
It's my guess that ALL of the Digital Editing systems can do that. Some are easier to understand than others, but the tricky bit comes later.
Can only speak for myself, but at some point comes the thought .. umm, would be nice if I could make that transition look like a “turning page”, errrm, that crossfade really should be a few seconds longer .. can I change fonts and colours in the titles? etc., etc ..
At that point I think the word is “hooked” (addicted?), and one begins to explore what the NLE really IS capable of.
At this point will have to do a bit of conjecture, since I've never really had much practical experience with the more “popular” mainstream NLE's, but it looks as if there is an “entry level” package of between $100 and $250. After that there seems to be ever increasing costs involved in “upgrading” to the more complex packages.
At $US49.99 for the downloadable e-version ($US59.99 [+postage] for the boxed CD) Movie Edit Pro 12 handles the very simple, easy to learn, potter about with 4:3 Standard Definition - right up to the incredibly complex; including the settings and capability for full 1080i High Definition Video. (10 “initial” settings range between Standard definition PAL 4:3 720x576; 25fps[including matching NTSC settings] – to HDTV 1080i, 16:9, 1920x1080; 25 or 29.97fps) – as well as DVD burning.
I still think it the best, simplest and easiest - cheapest “bang for the buck” that I know of.
A FEW DETAILS.
At this point, I don't have any “example” video edited on the MME P12 to show, as there are a whole heap of “new” settings relating to HDV and DVD to learn - but this is a screenshot from when I was working Standard Definition in MME P10. (On a Compaq, 1.8Ghz, 512 RAM, 80 Gig HDD).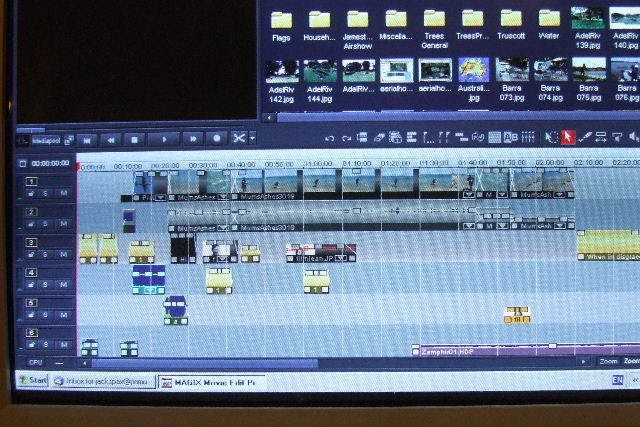
The “result” of that screen can be viewed at
http://au.youtube.com/watch?v=b-QrPMZjC3g
(some notes about that video: The "flying" B24 was a "still" photo - the "pan" was created through this edit program, as was the "explosion", from some of the "included" "visuals" and FX library. It's all on the Timeline.)
From memory, I think it took me – without any instruction or guidance, apart from the “help” files - 10-15 hours over several weeks to learn what P 10 was capable of – and another 15 hours over two weeks to “edit and create” the video clip mentioned above.
At this point, perhaps a note about "time".
It should be quite easy to "pick up the basics" of this system in a few hours, i.e. Record (capture) footage, choose a "take" or takes, Drag and drop them into Timeline, trim and butt them together - or select transitions and/or crossfades from the drop down list in the "storyboard view", add Header and Tailend titles .. then send the result back to the camcorder or DVD. (MME P12 burns to DVD straight from the Timeline[?]).
The "time" taken for this will depend on the length of footage involved. Thirty minutes of footage is 30 minutes of footage, and takes 30 minutes to Capture, just for a start. Then there is "render" time which - depending on length and compexity of the Project, as well as computer Processing power - can take several hours.
So, for those just starting out, will recommend a great deal of "time" spent on "Offline" Editing. I presume most Digital cameras can display "Time-codes" or "Frame counters". Time spent with the camcorder noting down the "start" and "end" numbers of the footage that one really wants, is time well spent (and conserves computer resources). In other words, only Capture the footage that is worth editing.
MAGIX Movie Edit Pro 12
Here is a screen-shot of the “Opening” screen, and basically gives three choices in tabs at the top – Record, Edit, Burn.
The central screen doesn't have to be there, as it has a “Don't show this screen again”, but basically asks “what do want to do? Load existing project or create new project” and contains the “Initial settings” drop-down for the project.
So, depending on the Aspect ratio and settings on the original footage - The full list from the drop-down is :-
PAL 4:3 (720x576; 25fps)
PAL 16:9 (720x576; 25fps)
NTSC 4:3 (720x480; 29.97fps)
NTSC 16:9 (720x480; 29.97fps)
HDV1 720p PAL 16:9 (1280x720; 25fps)
HDV2 1080i PAL 16:9 (1440x1080; 25fps)
HDTV 1080i PAL 16:9 (1920x1080; 25fps)
HDV1 720p NTSC 16:9 (1280x720; 29.97fps)
HDV2 1080i NTSC 16:9 (1440x1280; 29.97fps)
HDTV 1080i NTSC 16:9 (1920x1080; 29.97fps)
This is the screen that opens when clicking “Record” and gives a self-explanatory list of choices. Digital video (DV),(Have just noticed the box, second from left - says "Analogue Video", with a tick-box to "record directly onto DVD" - must check that one out, later, and see if I can connect a VHS player), Audio (microphone, tape recorder, Minidisc, Record player), Single shot, then HDV camcorder (HDV1, HDV2).
XP has recognised the camera, and is now ready to capture. Footage is "previewed" using the Play/stop buttons on the screen until a suitable section is found. Click "Record". Can watch progress (and any "dropouts") in the area bottom right.
EDITING
Next is the “New Project” screen, and has a total of 16 tracks to play with, but can also be “customised” to reduce the number of tracks on view. I find that 8 tracks fit comfortably on my computer screen without having to scroll down.
(lord only knows when I might need more than six tracks - but they are there, if needed).
This is the screen where one begins. The area at the top right (called the Media Pool) is where one can find anything that happens to be on the hard-drive to drag-and-drop into the Edit tracks. Above it are tabs to find "Import", "Fades", "Titles" and "Video Effects" (which, like everything else, are Drag-and-drop). Want to increase the colour saturation? Increase or decrease the Gamma? Just "select" it then drag-and-drop onto the Take that you want to change. There IS also another pop-up panel for "Fine tuning" any of the "visual adjustments" - but won't go into that detail here.
At the moment it has the “my Audio/Video” choices (edit projects with the Magix .MVD filename awaiting completion), from the list of buttons located between the “preview” screen and the area at top right which include “My Music” (at present is set to my WinXP music folder, but could be any folder on the hard drive), “My Pictures” (my WinXP photo folder) .. and a few others.
Oh, the third button down is “Takes”, which is where Magix stores everything “captured” from the video camera during the “Record” phase. It automatically separates out each “take” according to when the camera was turned on or off (well, generally; can be turned off to make one long “take”) and stores into a folder (your choice of name).
The blank screen top left is the "preview" screen, which can "automatically" monitor or preview any of the Takes, Audio, Transitions, Video FX, Title FX - when clicking on any icon or thumbnail in the Top RHS screen (Media Pool) - as well as being the Main preview screen for the whole "movie" when the cursor is clicked on any "object" in the Timeline tracks. You should be able to see the controls just underneath it. (Back to start, Nudge back, Stop, Play/pause, Nudge forward). And yes, can be made to display a Frame counter and/or Full screen.
The thin vertical red line seen running through the first "frame" just to the right of the LHS track control boxes is "where you are at" on the timeline, and should be showing a pic in the preview, but the "object" was chosen at random, and is an .AVI "3D animation" (created in DAZ 3D) in a "black box" - so it looks like the "PrtScr" didn't like it - but while am here, just to the right of the "screen controls" mentioned above, is the "scissors" icon - the "trim tab". The drop-down menu gives you "cut scene" which slits the selected object(the pink bit) at the red line; "delete scene beginning", which deletes anything to the left of the line in that object(take); "delete scene ending", which deletes anything to the right of the line in that take only, and automatically bringing adjoining "takes" together. Deleting whole takes, or groups of takes from the Timeline (selected by "Shift+ click"), is done with the "X" button .. but not to worry - there is always the "Undo" button.
So, just open the folders, icons or thumbnails that are displayed for easy preview or selection in the Media Pool, then drag-and-drop into whatever track one chooses. Transitions can also be easily added or controlled from the "Storyboard" screen.
TITLES
This is the title control panel, where one writes, and sets up the fonts, movements, placement and scrolling. After clicking "Apply" the title(s) appear on track 3 - you should see it as a yellow rectangle in other pics ("active" objects are coloured pink). Once there, they can be controlled with the cursor and little corner handles like everything else. Make them longer, shorter, fade in or out faster or slower, slide them backwards and forwards along the track. Same with any "object" on any track. Click and hold on any of the control handles. Slide the central one up and down to adjust the "intensity" of any visual; or "volume" of any Audio. (these adjustments are, of course, "rough" - there are "fine-tune" panels for pretty well everything)

AUDIO
I rather like the way it handles AUDIO.
The audio track from the “captured” take can also be separated from its original “image” and "nudged" a few frames left or right to fine-tune synchronisation - or taken (dragged) wherever one likes.
Everything is controlled from just one screen. Any “manipulation” panels pop up as 1/3 size on top of the “Main” screen, and are “floating” - so can be placed in whichever corner is out of the way.
There is a 16 track "mixer", for multiple Audio tracks.
There is also “contour” cursor with which one can “adjust” small sections on an Audio track – useful when one wants to “nick out” an unfortunate click or thump on the original track. Have magnified the section for clarity (magnification courtesy of my mouse – not Magix).
And can add an Audio FX control panel - for each individual track. Equalizer, Reverb, Compressor.
DVD burning
Can't say much about this aspect, haven't got that far on the "learning curve" yet. This, though, is the screen that pops up when clicking on "Burn" tab at the top.
If the reader is seriously considering purchasing the download Edition – or for more details (on their Website promo) click here -
Save $5 off MAGIX Movie Edit Pro 12 - Use Coupon Code MAGIXCJ08
Labels:
digital video,
editing,
Personal
![]()
Another reason for the dearth of posts is that have "upgraded" a lot of equipment. Would be nice to say that Santa was good to me in December, but have managed it by dint of savings and tight budget.
The new equipment comes with a considerable learning curve so, once again - there will be few posts for a while until i can figure out all the little operating details and get back to creating , and posting, video clips.
Acer Travelmate 7720G
Canon HV20 High Def camera
Libec TH-650 tripod
Rode video microphone
as well as "upgrading" the MAGIX Digital video edit program, which copes quite happily with full High definition 16:9 video footage.
(.. and click this link .. heh)
Labels:
difficulties,
equipment,
Personal,
technical
![]()
One of the reasons that there has been no posts on this blog for some time is that have forgotten how to sign in to it. Frankly, managing multiple blogs on "Bluuger" is the proverbial pain in the arse, posterior, neck, psyche - or whatever part of the anatomy hurts most.
At some point will try to migrate this blog to Wordpress, which has the facility to manage multiple blogs from the one "control panel" - but the technical details are complex, and not yet fully understood.
In the meantime, this is the embryo "new" Address.
http://davinozvid.wordpress.com/
Cheers and Best of Season's Greetings to the occasional visitor, and may all the joys for the next series of years arrive with no strings attached .. heh.
Labels:
Comments,
Personal,
template changes
![]()